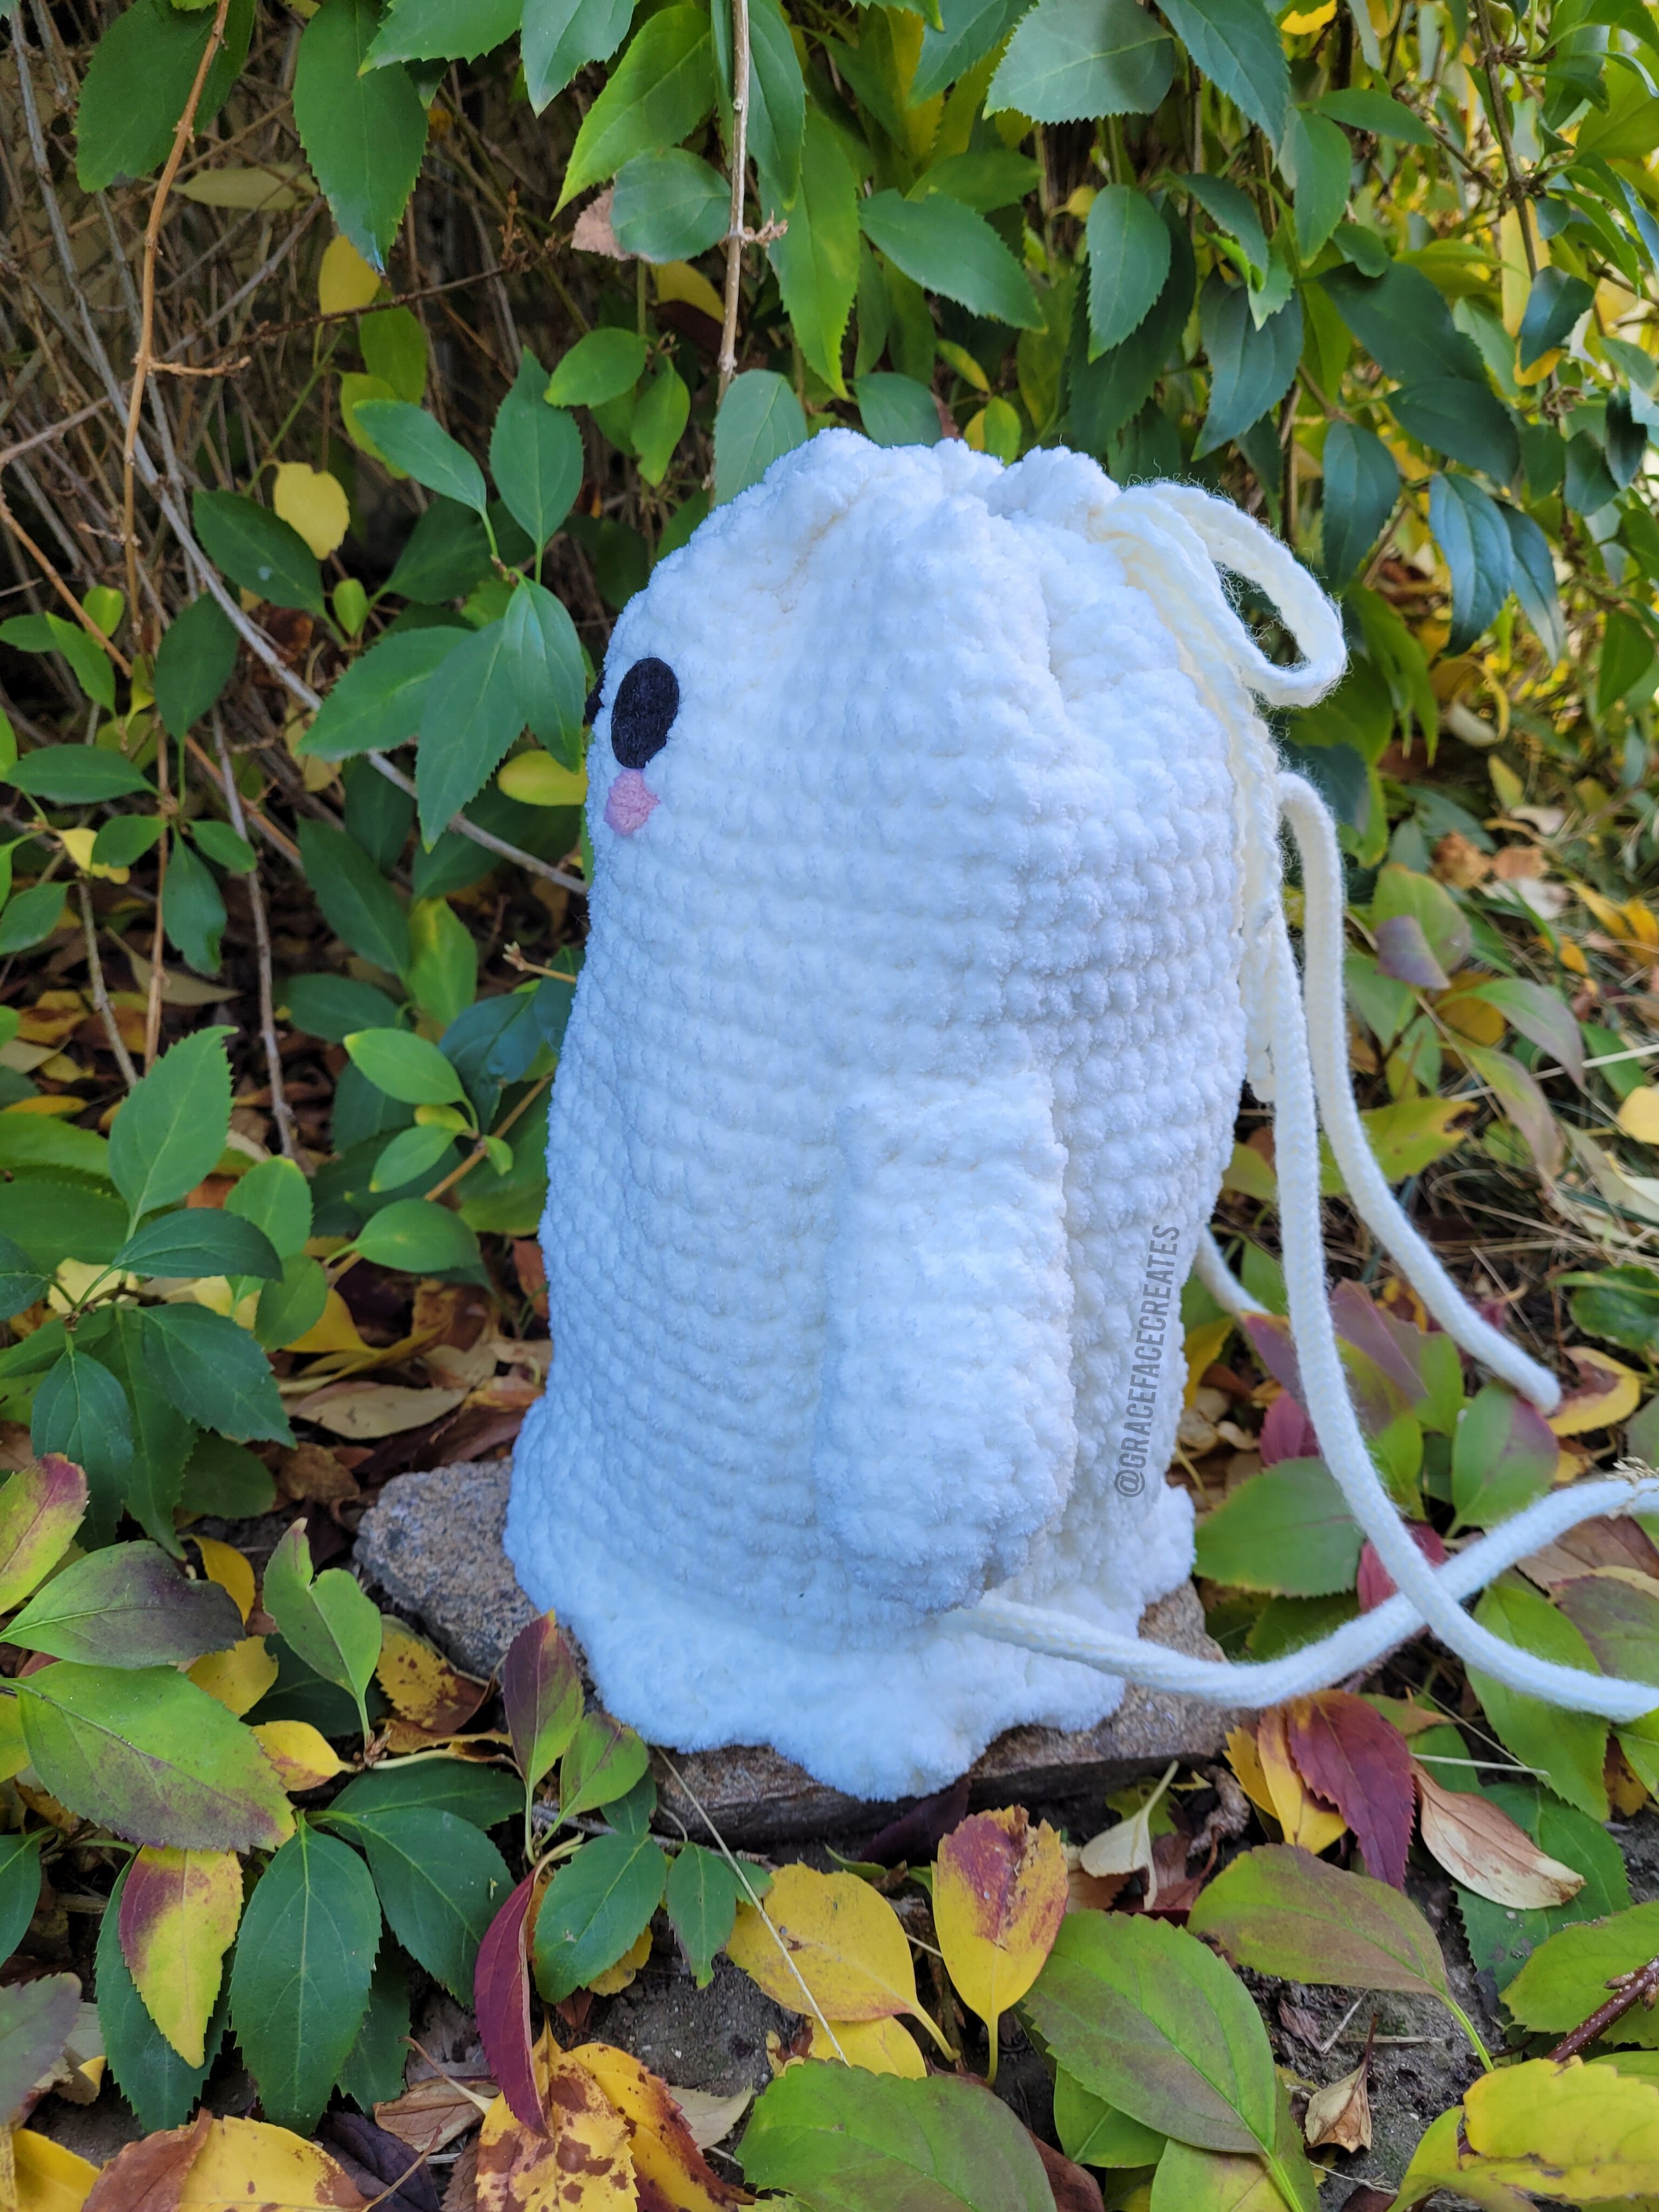
Ghost Friend Backpack crochet pattern

Spooky Season is here! I don’t know about you, but this is my favorite time of the year. Cooler weather, cloudy & gray days, wearing layers, drinking hot cider, and who could forget HALLOWEEN! Maybe it’s because my birthday is so close to it, but Halloween has always been my favorite holiday. As a fan of imagination and creativity, I love anything that can inspire fun and whimsy. That’s probably what drove me to make the Ghostie Backpack, and likely what drove you here as well.
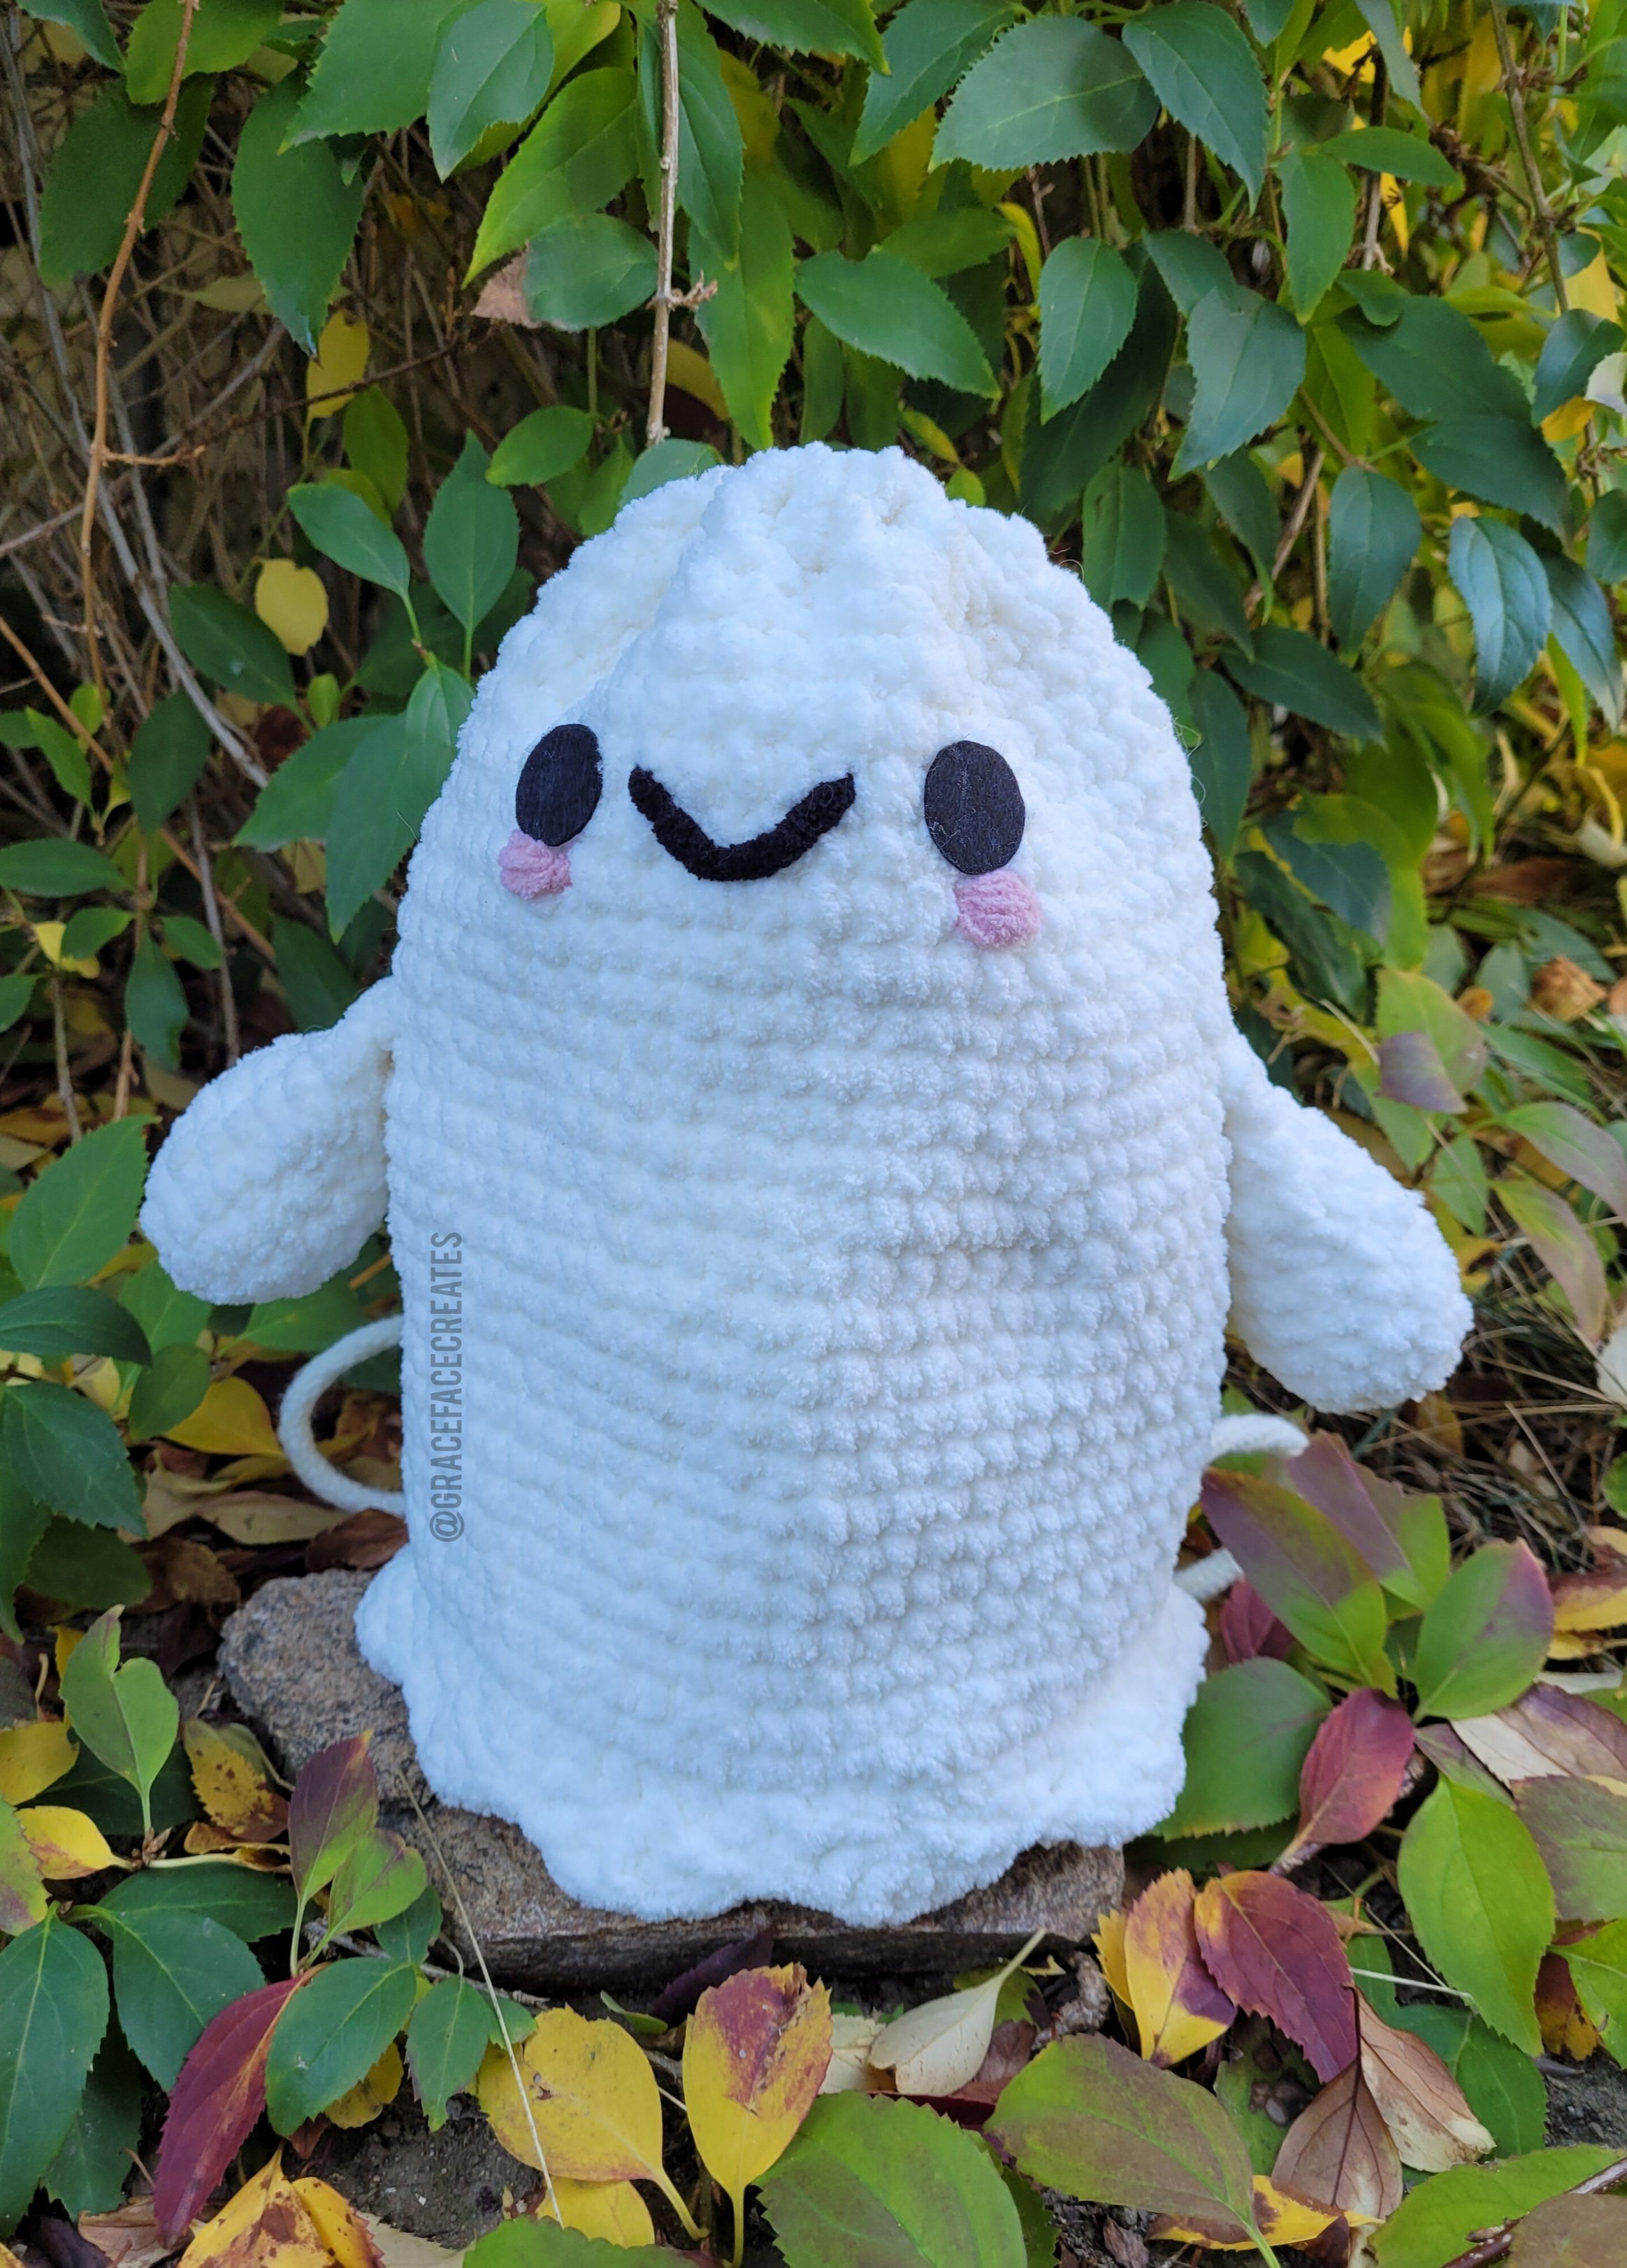
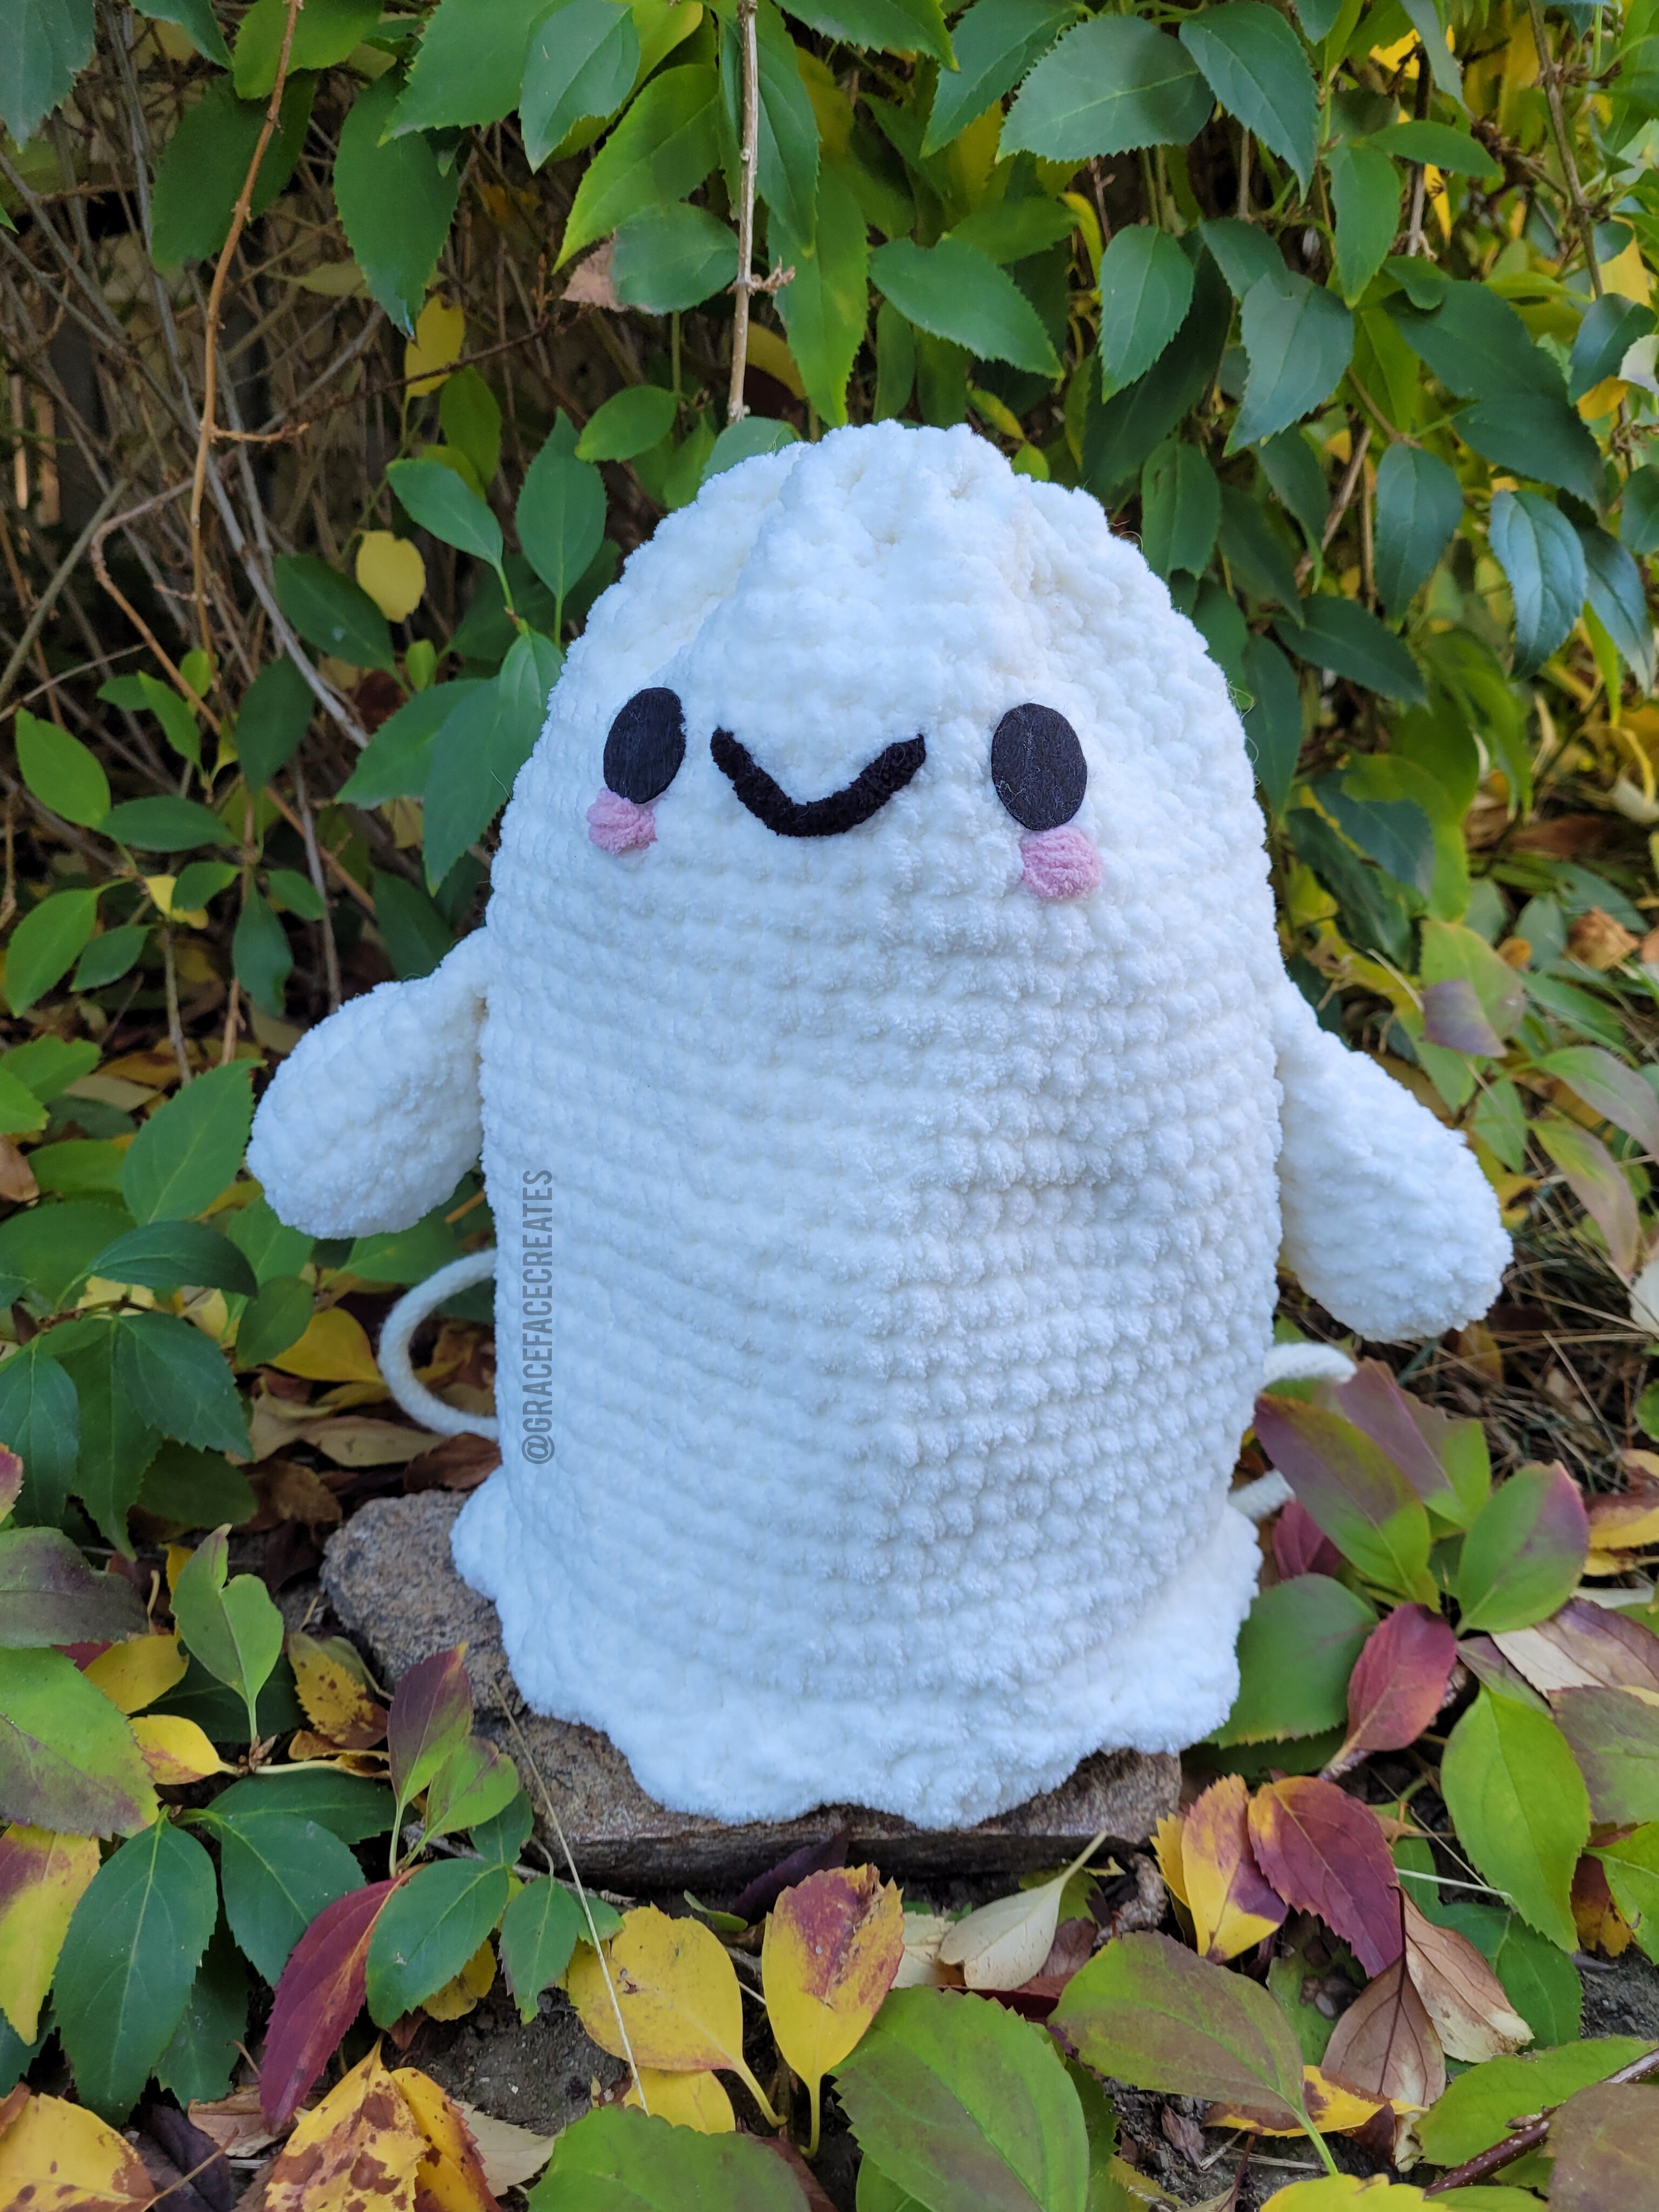
Most people I know who love Halloween love spooky things, but drift into being horror fans. I prefer cute and silly spookiness. G-rated spooky! This backpack fits my description of being cute, and embodies the kind of Halloween vibes I like to put out into the universe.
The Ghost Friend Backpack is a low sew project; The only sewing is attaching the straps (and a liner, if you choose to line your bag). This is a relatively easy project that comes together in about 4-6 hours, and is super rewarding!
But enough talk; Let’s get crocheting!
Materials:
Approx 150yds White blanket yarn (I used Premier Basix Chenille in Winter White)
6.5mm crochet hook
Scissors
Sewing needles & pins
Stitch markers
20mm round black felt eyes & adhesive/glue for eyes OR black acrylic yarn & 3.75mm hook to make crocheted eyes
12-18 inches black blanket yarn (for mouth. You could use felt instead, if preferred)
Black sewing thread (to secure mouth)
18-24 inches of pink blanket yarn, for rosy cheeks
1 inch D ring (For single strap option)
White worsted weight yarn for strap & drawstring, or straps & drawstring of your choice (see suggestions below in Straps section)
A handful of Poly-Fil stuffing (for arms)
If you’d like to line your bag, you will also need:
Fabric of your choice, approx 22 x 13 inch rectangle
White sewing thread
Measuring tape or a ruler
Abbreviations:
Written using US crochet terms
MC - Magic circle
CH - Chain
SLST- Slip Stitch
SC - Single crochet
DC - Double crochet
BLO - Back loops only
FLO - Front loops only
INC - Increase (2 SC in the same stitch)
DEC - Decrease (I use an invisible decrease; SC 2 stitches together using the front loops only)
SK - Skip (to skip a stitch)
Arms (make 2)

Crochet through both sides of the arm to seam it closed in R10
R1: Form a MC, SC 8 into the MC [8]
R2: (SC, INC) x 4 [12]
R3-8: SC x 12 [12] 6 rounds
R9:(SC, DEC) x 4 [8]
Stuff lightly
R10: CH 1, Flatten the arm and seam closed using 4 SC [4]
R11: CH 1, turn, SC x 4 [4]
FO

The finished arm (make 2)
Ghost body
R1: Form a MC, SC x 8 [8]

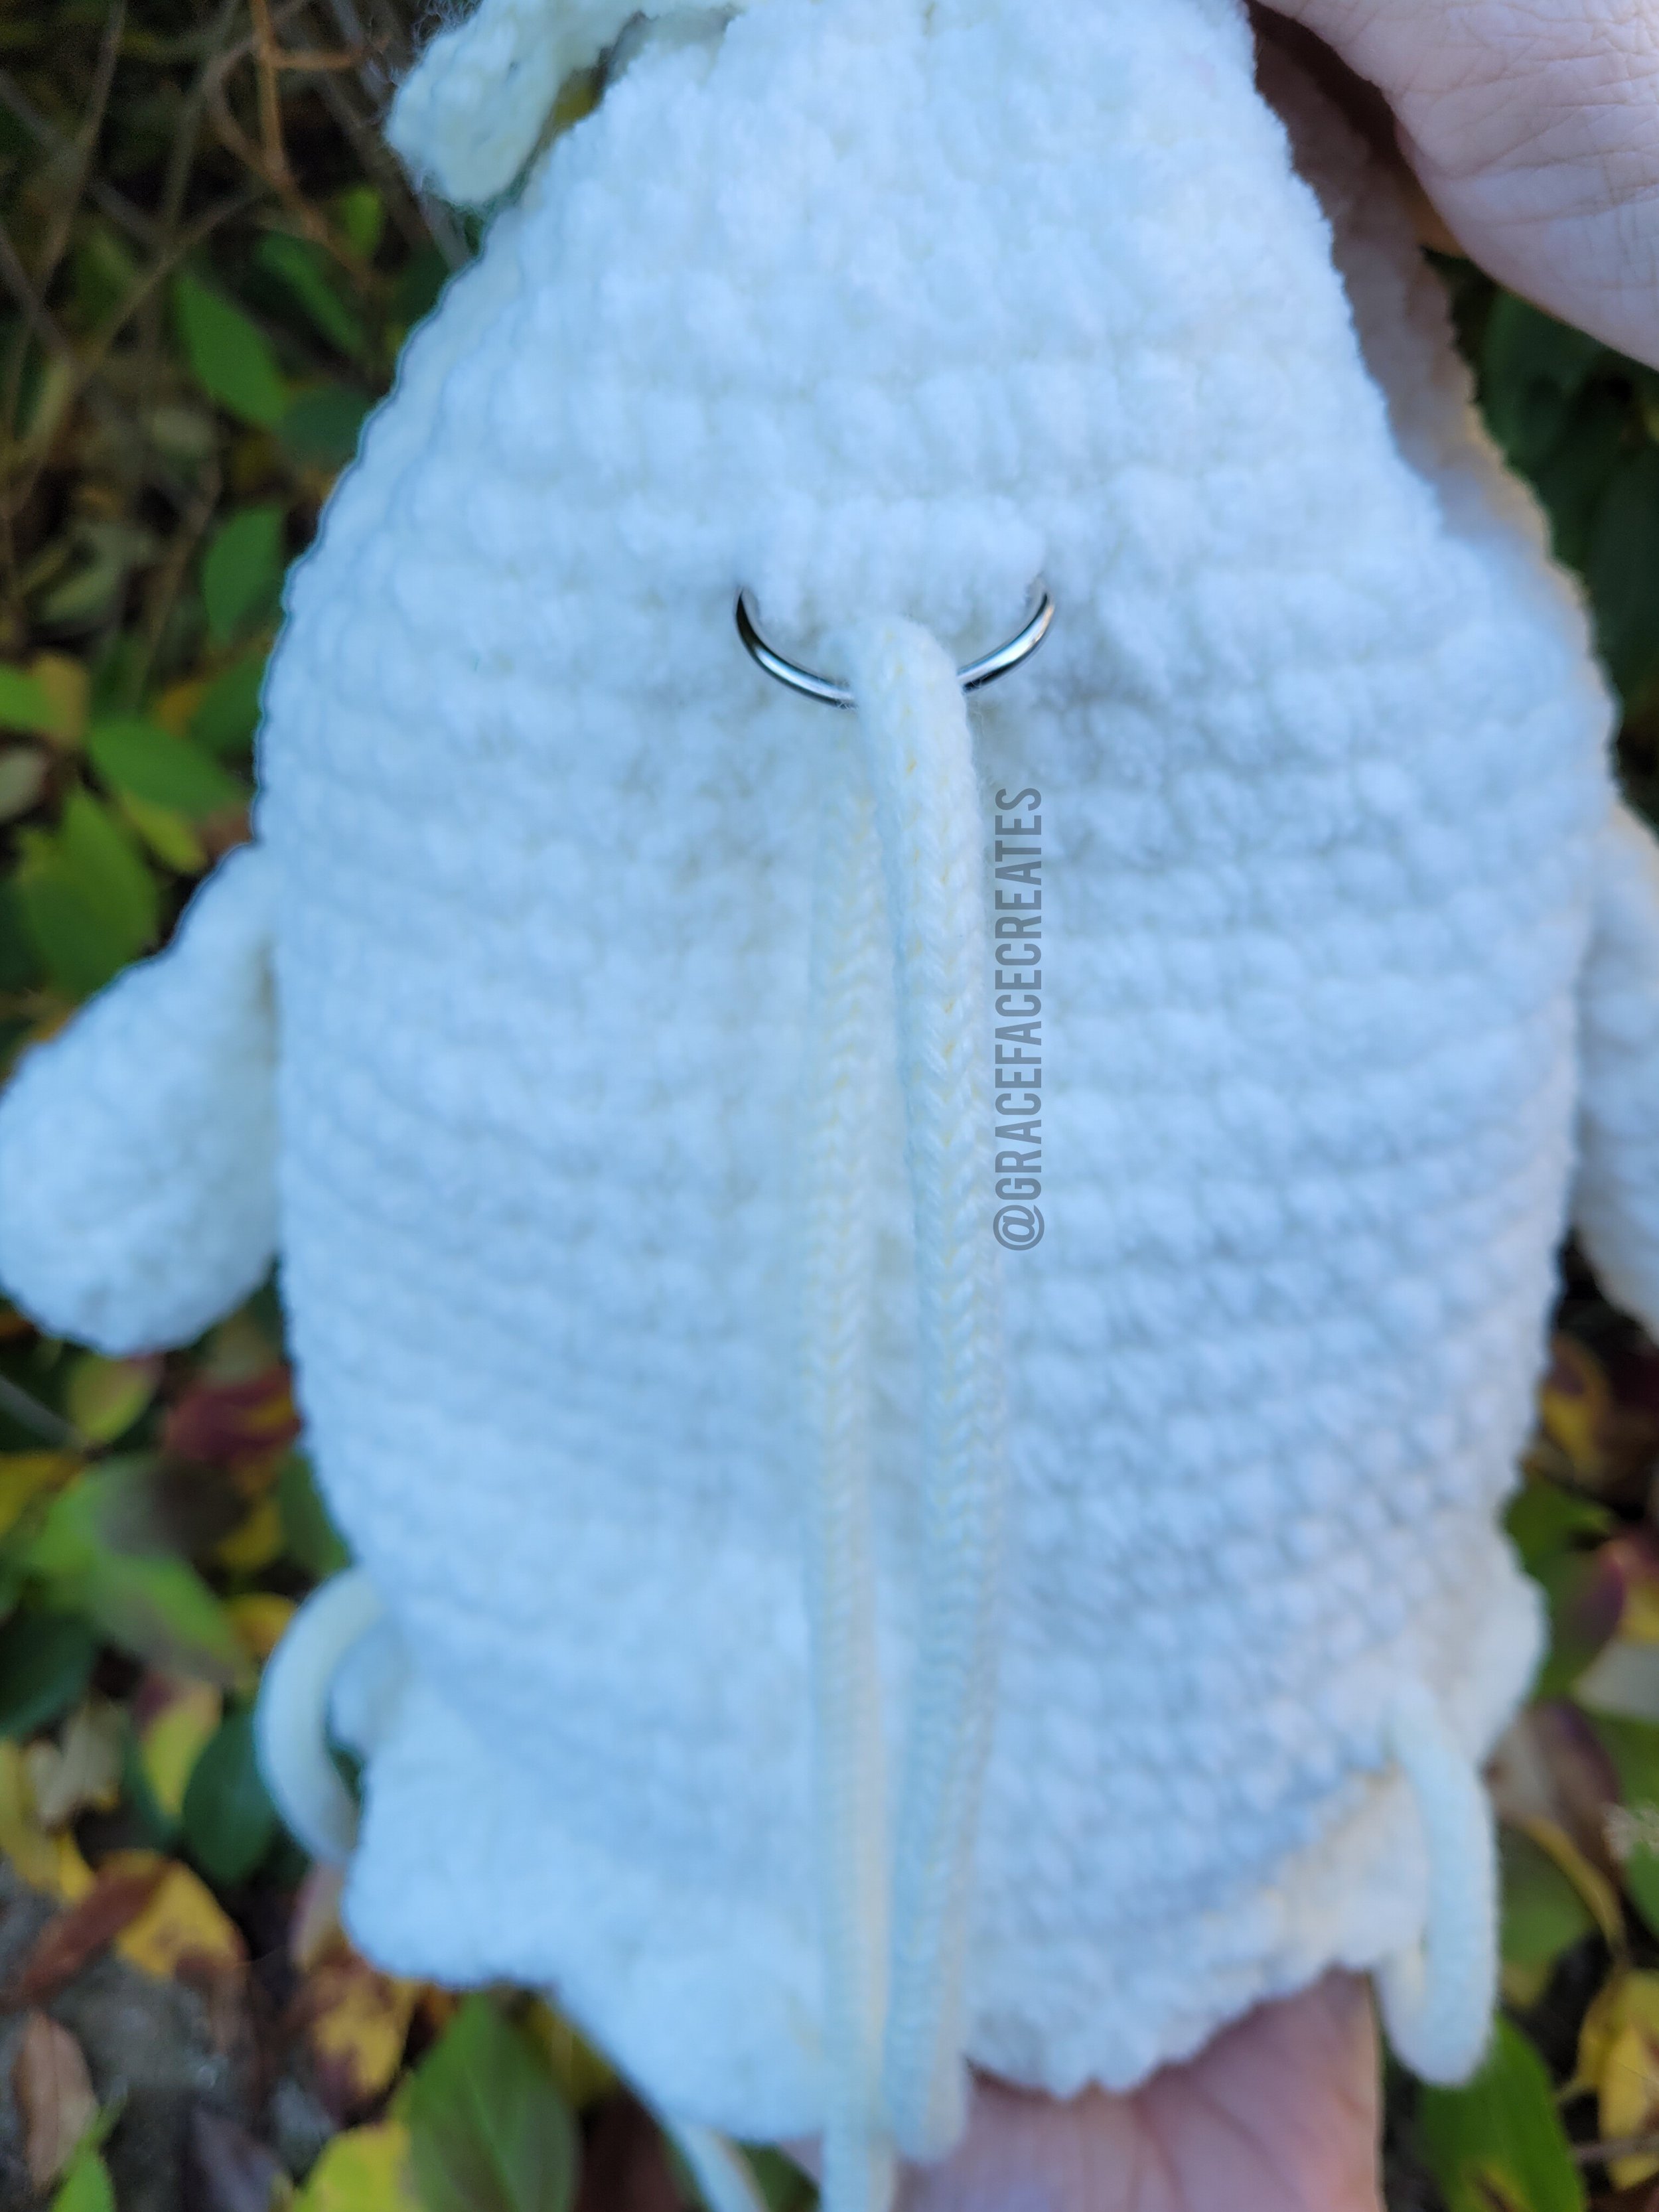
Here you can see the stitch marker the 1st front loop of R10
R2: INC x 8 [16]
R3: (SC, INC) x 8 [24]
R4: (SC x 3, INC) x 6 [30]
R5: (SC x 4, INC) x 6 [36]
R6: (SC x 5, INC) x 6 [42]
R7: (SC x 6, INC) x 6 [48]
R8: (SC x 7, INC) x 6 [54]
R9: (SC x 8, INC) x 6 [60]

Place your hook through the arm and the body to crochet the arms in place on R24
R10: SC BLO x 60 [60] place a stitch marker in the 1st & last Front Loop of this round
R11-R22: SC x 60 [60] 12 rounds
R23: (SC x 18, DEC) x 3 [57]
On the next round, we will be crocheting the arms onto the body
R24: SC x 8, SC x 4 thru arm & body to attach arm in place, SC x 25, SC x 4 to attach 2nd arm, SC x 16 [57]
R25: SC x 57 [57]
R26: (SC x 17, DEC) x 3 [54]
R27-28: SC x 54 [54] 2 rounds
R29: (SC x 16, DEC) x 3 [51]
R30-31: SC x 51 [51] 2 rounds

After you CH 2 & turn, it’s time to start double crocheting
R32: (SC x 15, DEC) x 3 [48]
R33-34: SC x 48 [48] 2 rounds
R35: SLST x 2, CH 2 (counts as DC), turn, DC x 47, SLST to join round [48]
FO & weave in ends
Ghost skirt

Placing the 5DC into the same stitch & skipping the 2 stitches on either side creates this decorative pattern for the ghost’s skirt
Attach white blanket yarn to the last marked Front Loop of R10 on the Ghost body
R1: CH 1, SC x 60, SLST to join round [60]
R2: CH 1, (SC, SK x 2, DC x 5 into the same stitch, SK x 2) x 9, SC, SK x 2, DC x 5 into the same stitch, SLST into 1st ST of the round, FO
Weave in ends from the skirt
Drawstring
Using white worsted weight yarn CH until you reach desired length (1.5 times the circumference of the bag). Weave drawstring between the DC stitches of R35, with opening centered on the back of the back (the side where we joined the final round)
Face details
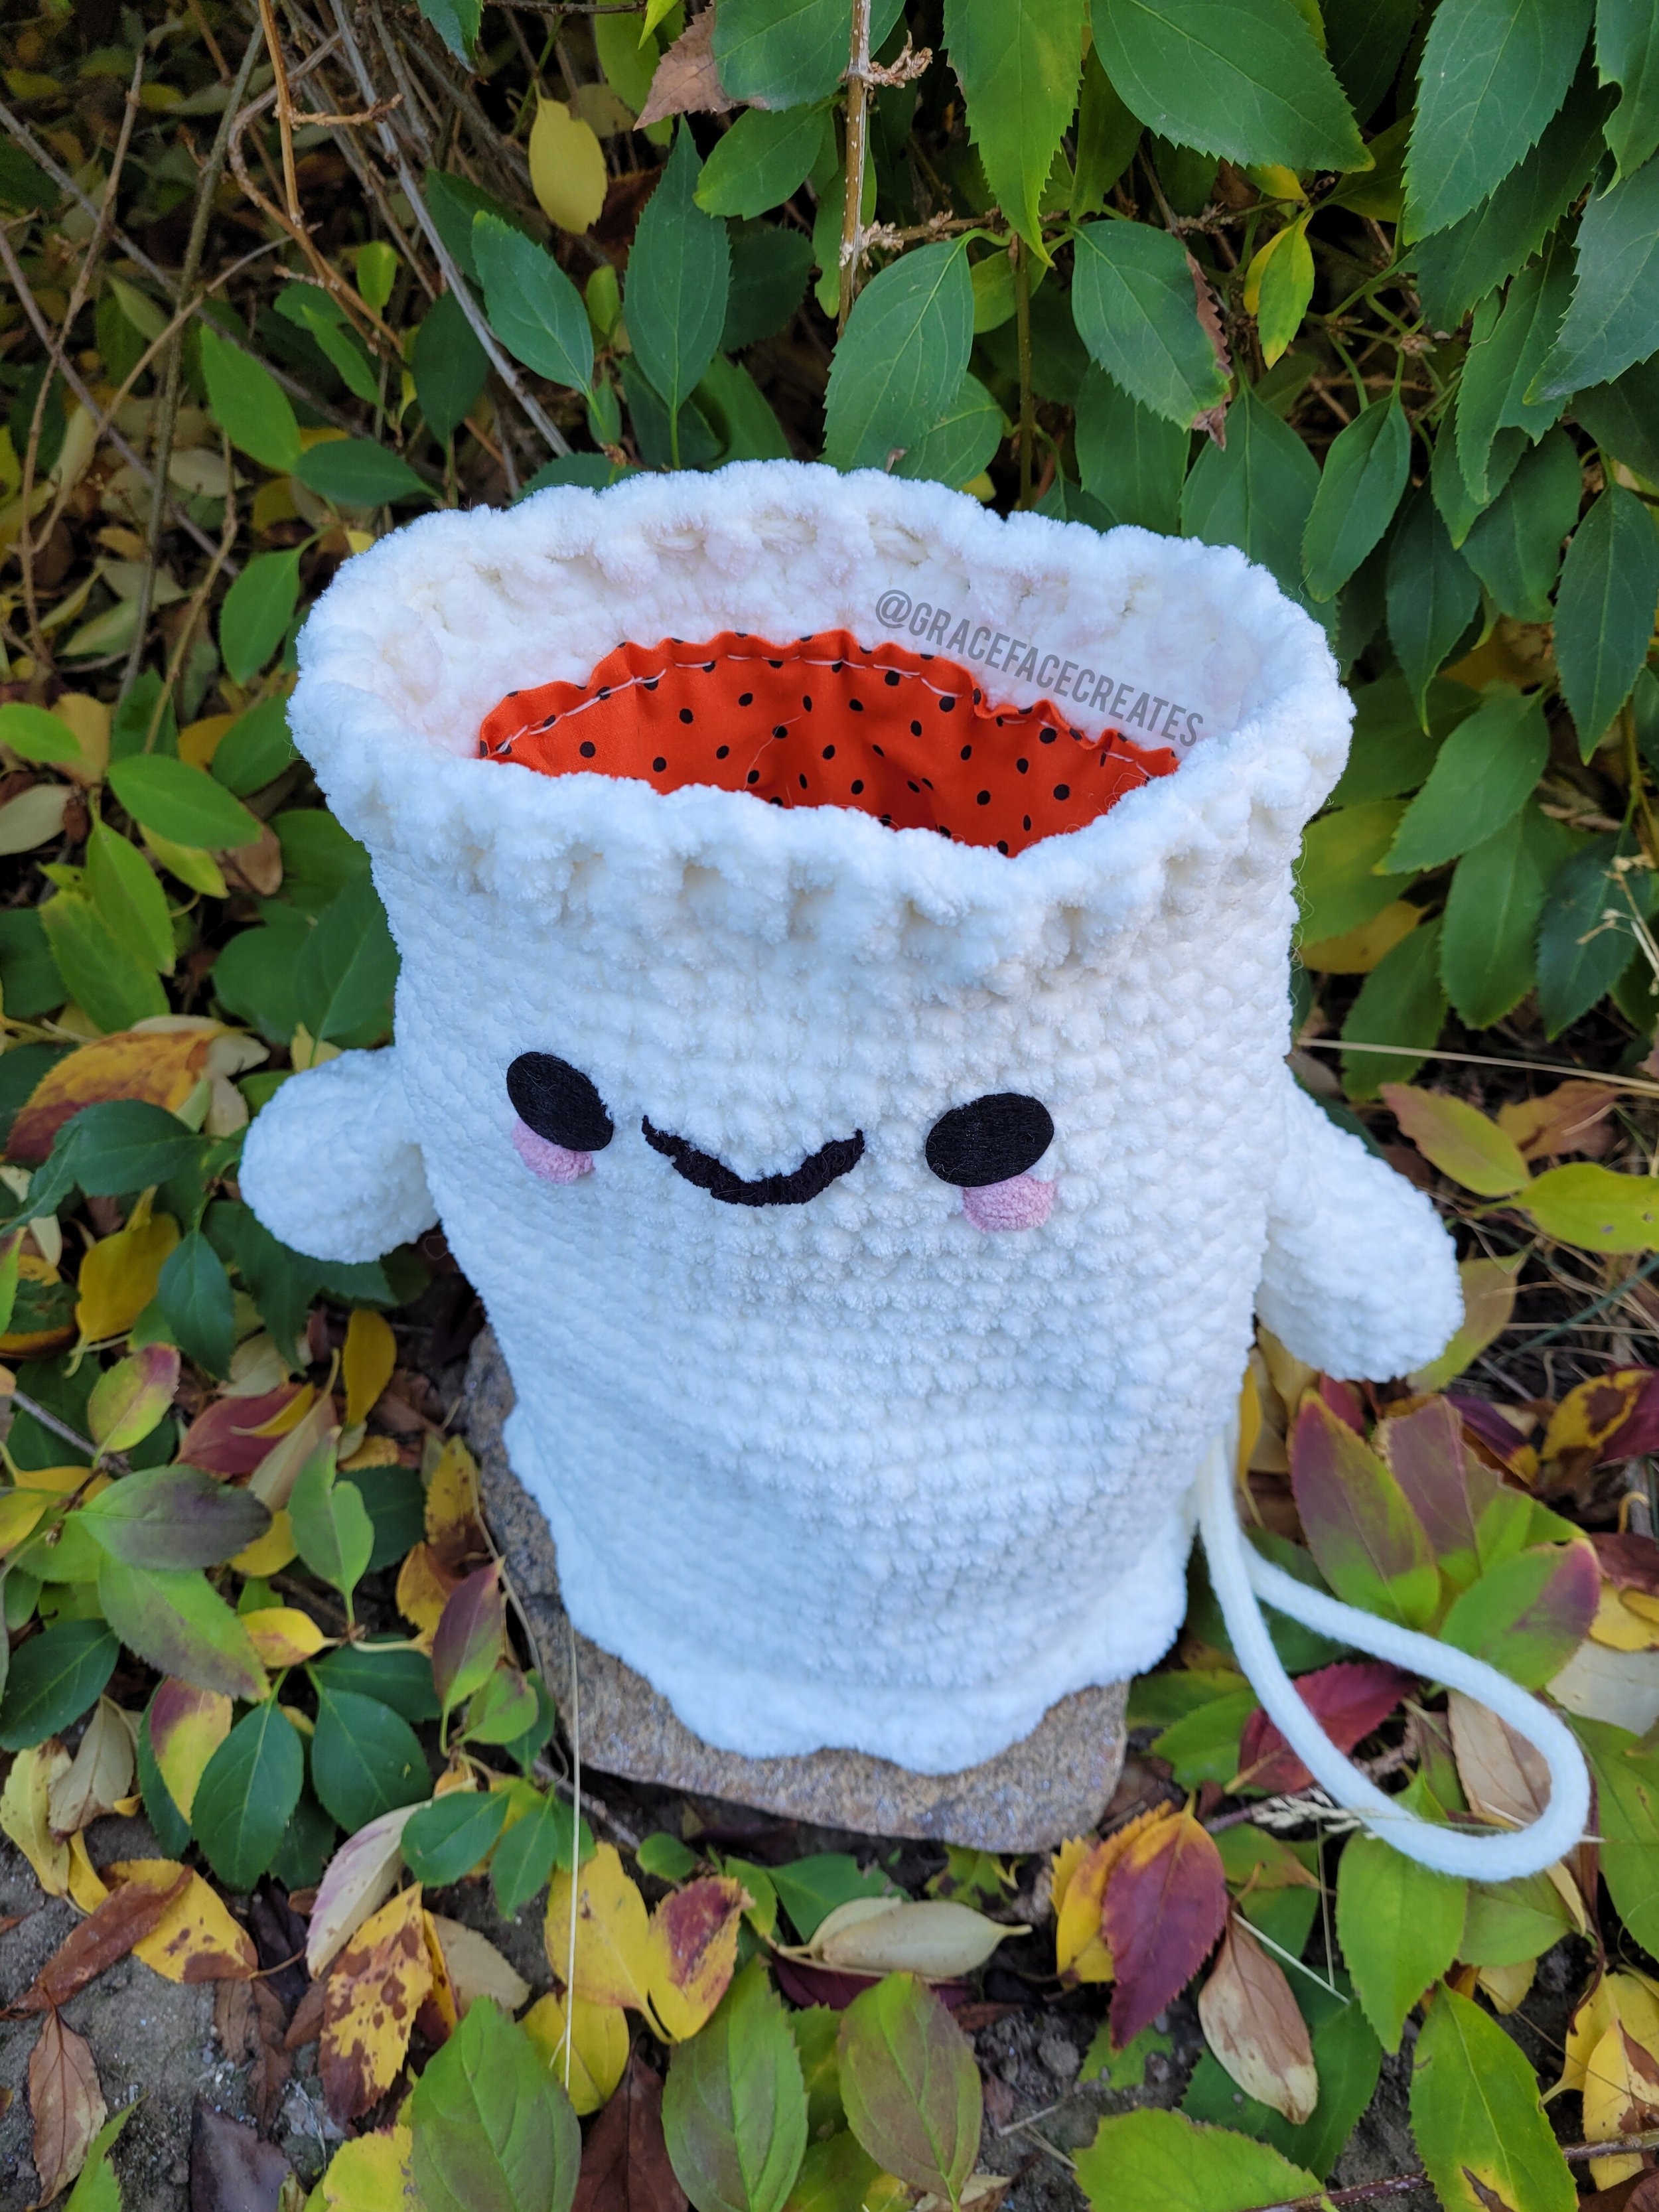
Eyes- Attach eyes to round 27-29, approx 8 stitches apart
OR
To crochet eyes: (Make 2)
Using black worsted weight yarn & 3.75mm hook
R1: form a MC and place 8 SC into the MC
R2: SLST x 8, FO

Mouth- You can cut a mouth from felt or use blanket yarn. Decide where you’d like the mouth to be (I place it in between the eyes about 1-2 stitches away from the eyes). Thread black blanket yarn onto needle. Sew a loose line across the face for your mouth & leave the ends loose inside. Thread the black sewing thread onto a needle & use thread to tack the mouth into place. Stitch the mouth from one side to the other, then knot the sewing thread and trim the ends. Tie the black blanket yarn ends together, being careful not to over tighten, or you will distort the shape of the mouth. Trim the ends.

Rosy cheeks- Thread the pink blanket yarn onto a needle. Select 2 stitches on the face where you’d like the blush to be. Wrap the pink blanket yarn around the 2 selected stitches loosely 3 times (over tightening will distort the shape of the face). Tie the ends together and trim. Repeat on the other side of the face.
Alternately, you could use make-up or felt to give your ghost rosy cheeks, or skip this step altogether, if you prefer.
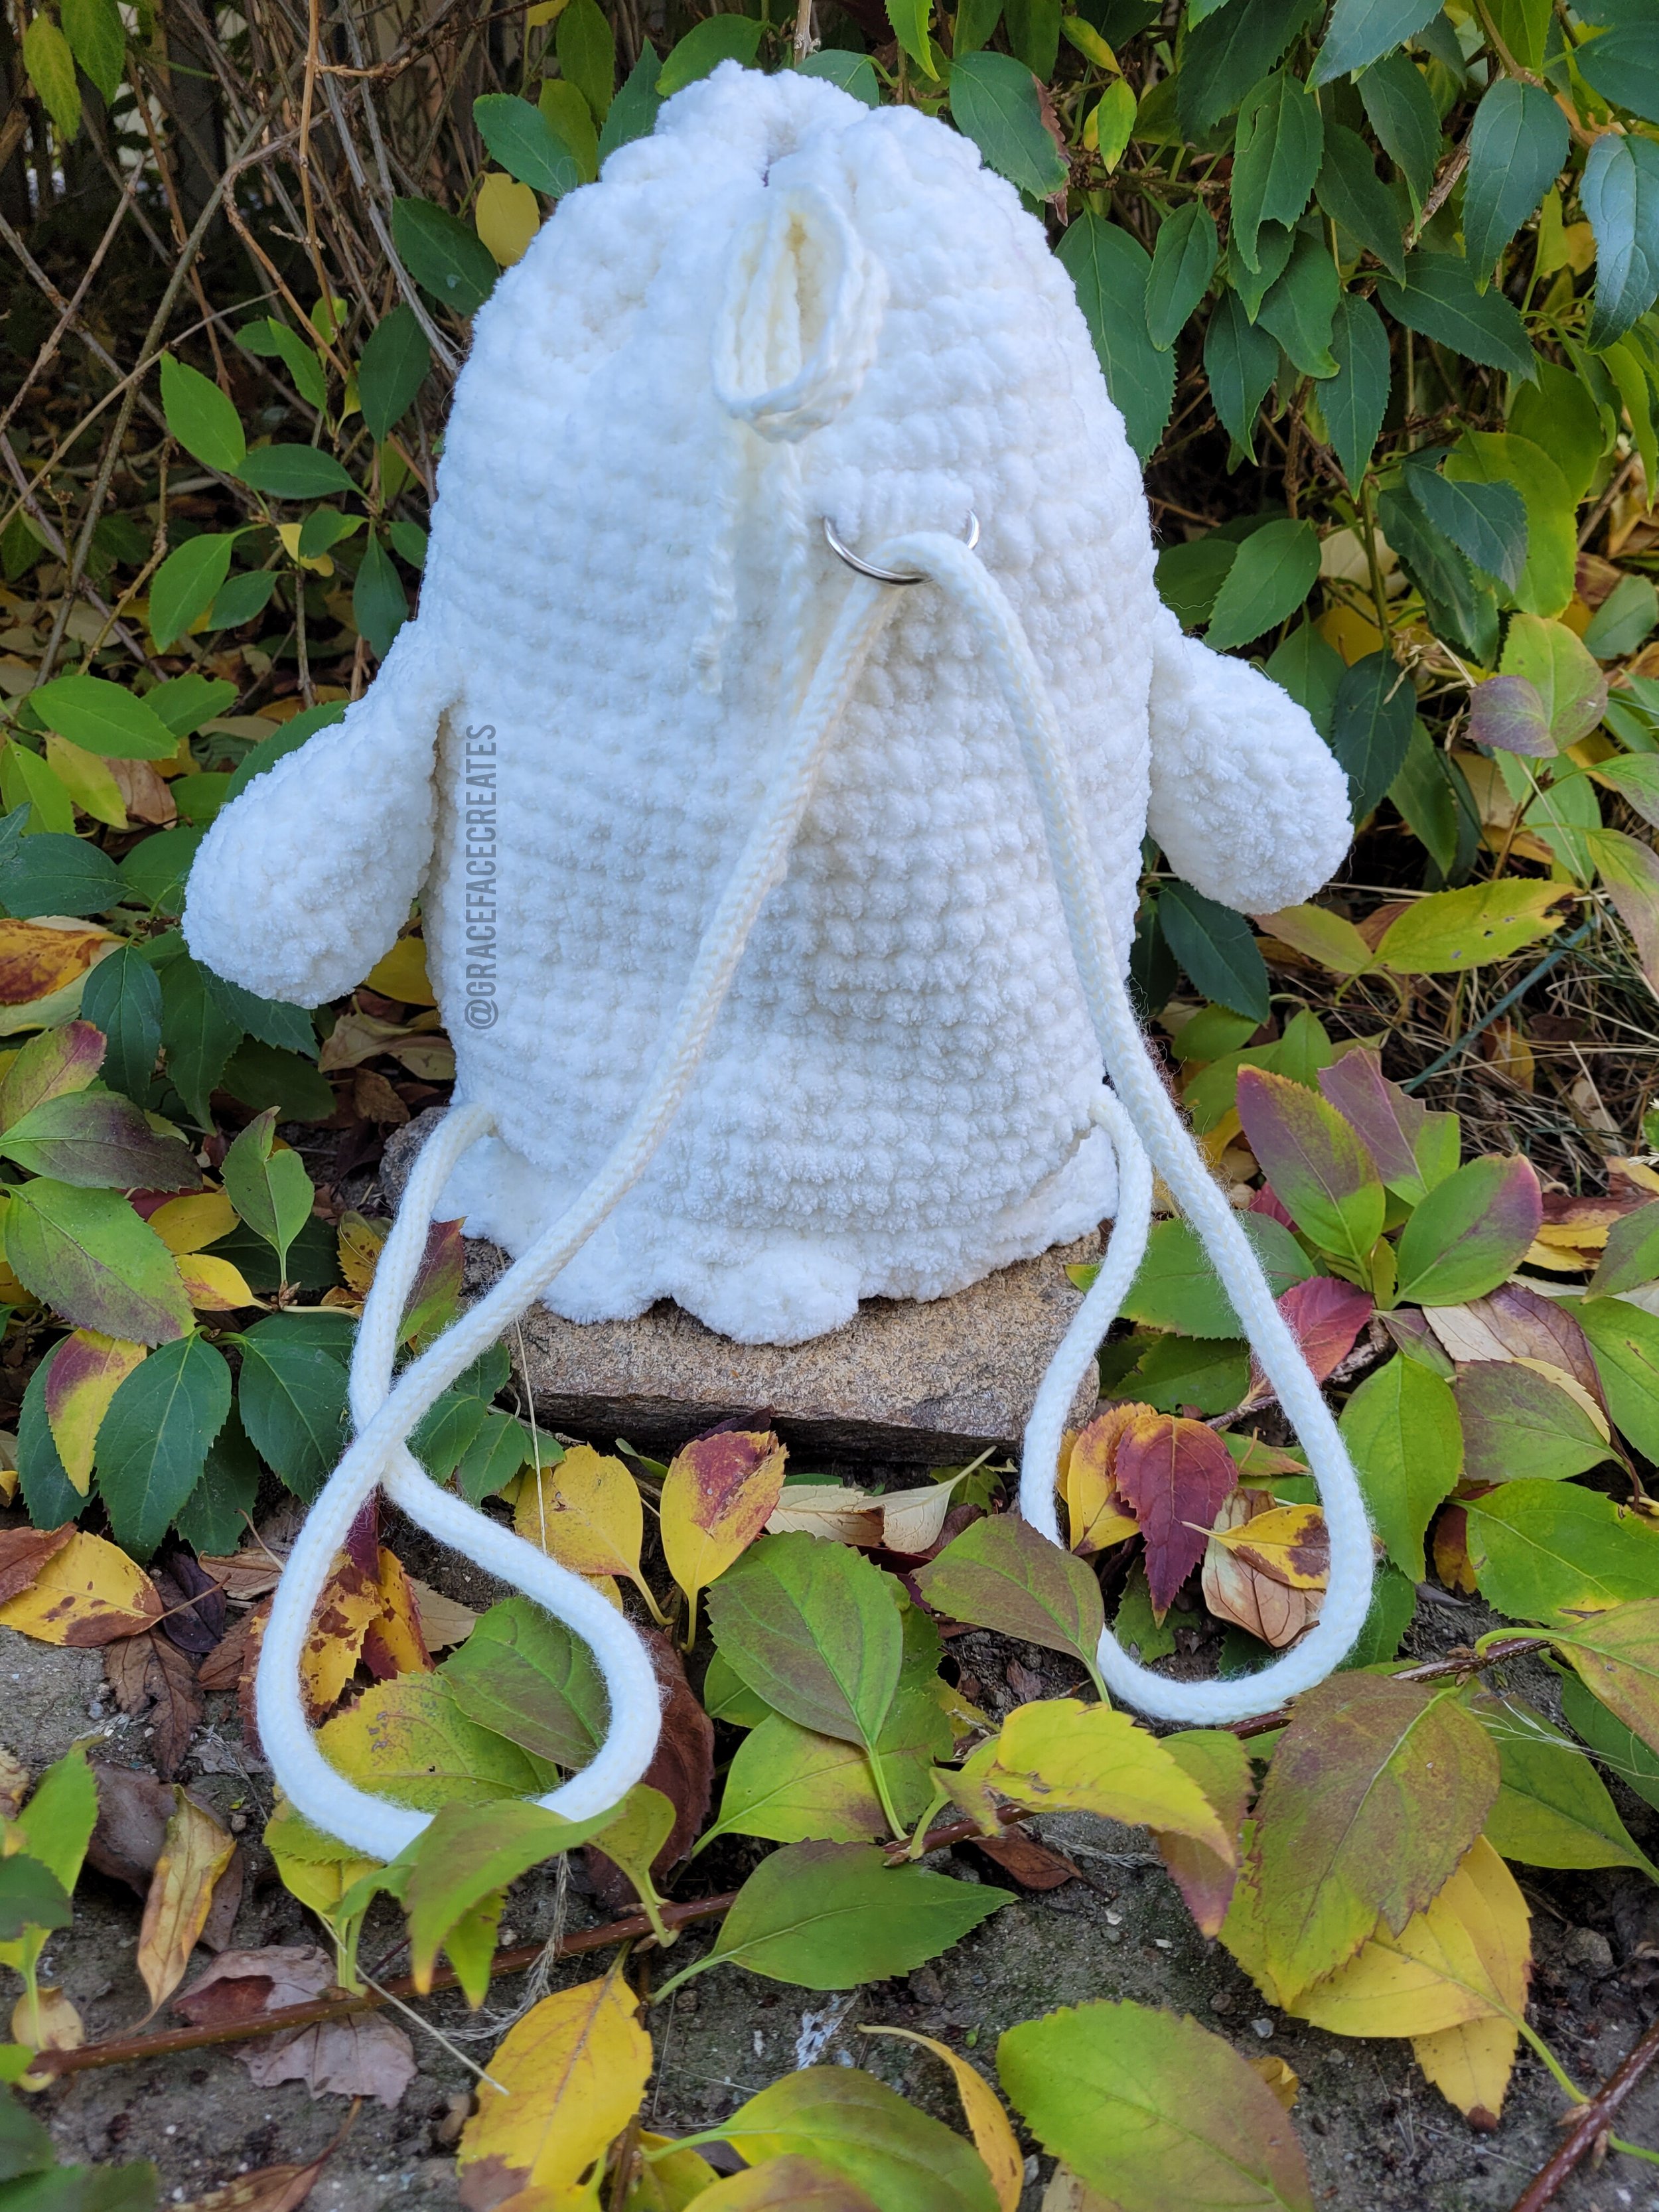
Strap(s)
The strap attaches at the bottom and loops through the D ring before being attached at the bottom on the other side
I used I-cord made using my Tulip I-cord maker. You could use a lot of different materials for your straps: crocheted I cord, woven nylon straps, fabric, rope, ribbon, reused straps from an old bag/purse/backpack, etc. You can also crochet flat straps by CH until you reach a good width, like 1 or 1.5 inches, then CH 1, turn, starting in the 2nd CH from the hook place a SC in each CH. CH 1, turn & SC every stitch. Repeat the row until you reach your desired length. Please note that crocheted straps might stretch over time, resulting in a saggy bag. You can stop this by sewing a ribbon to one side of your strap that runs the entire length of the strap. This does require ribbon, as well as extra sewing. You can also make your straps shorter than your desired length to accommodate for the stretching.
Everyone’s body is shaped differently, so you may need shorter or longer straps than I did. If you are unsure as to what length you need, try cutting a piece of yarn and pinning it in place, try on the bag, then check the length and adjust it, if necessary.
Single strap & D-ring method:

This is the placement for the straps and D ring, with the straps anchored at the bottom points indicated by the fingers in the photo. If you’re using 2 straps, attach the bottom of the straps in the same location as the single strap method, and the tops of your straps to the same spot as the D ring in the photo.
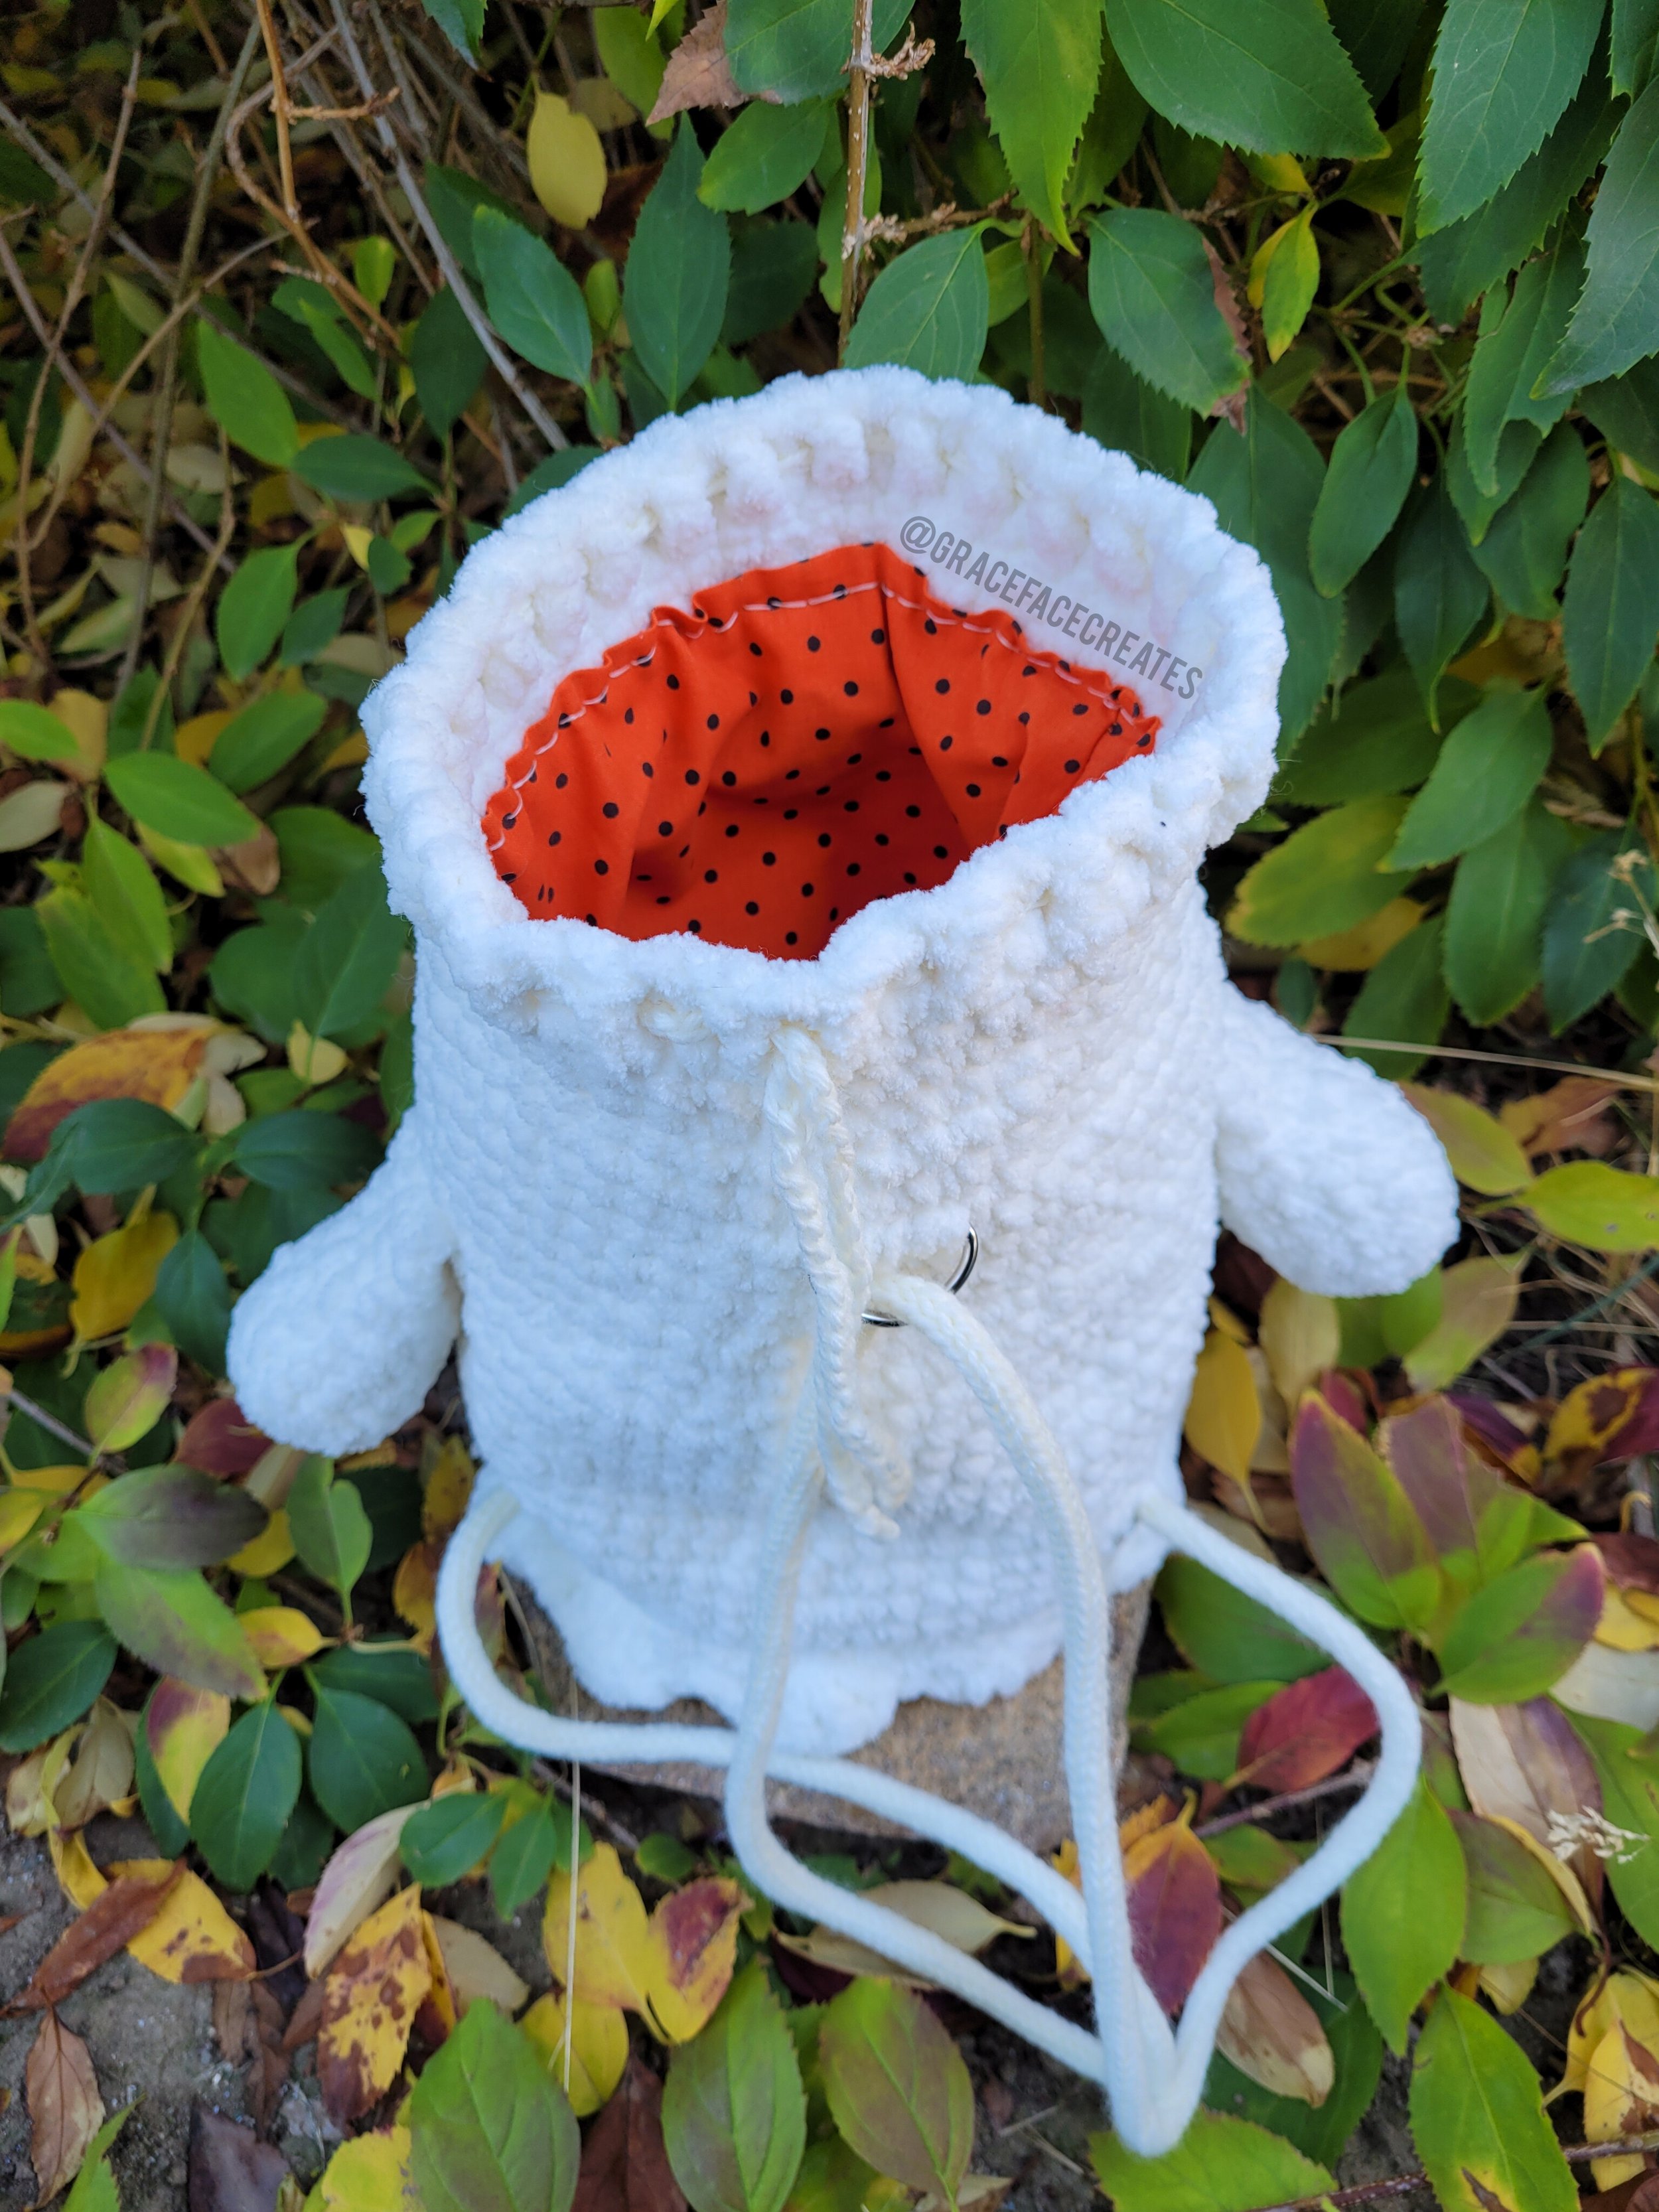
This method uses 1 long I-cord/strap that measured approx. 48 inches and a 1 inch D ring to create 2 straps (see photos). Attach the D ring horizontally 6 Rounds down from the top of the bag. Attach the I cord/strap on 1 side of the bag at R10, about 3 stitches away from the arm (see photos). Feed the I-cord through the D-ring and attach the other end to R10, about 20 stitches from the other attach point.
2 strap method:
The attachment points are the same as above, but instead of attaching a D-ring, attach the tops of your straps to the D-ring attach point. You will then have 2 fixed length straps.
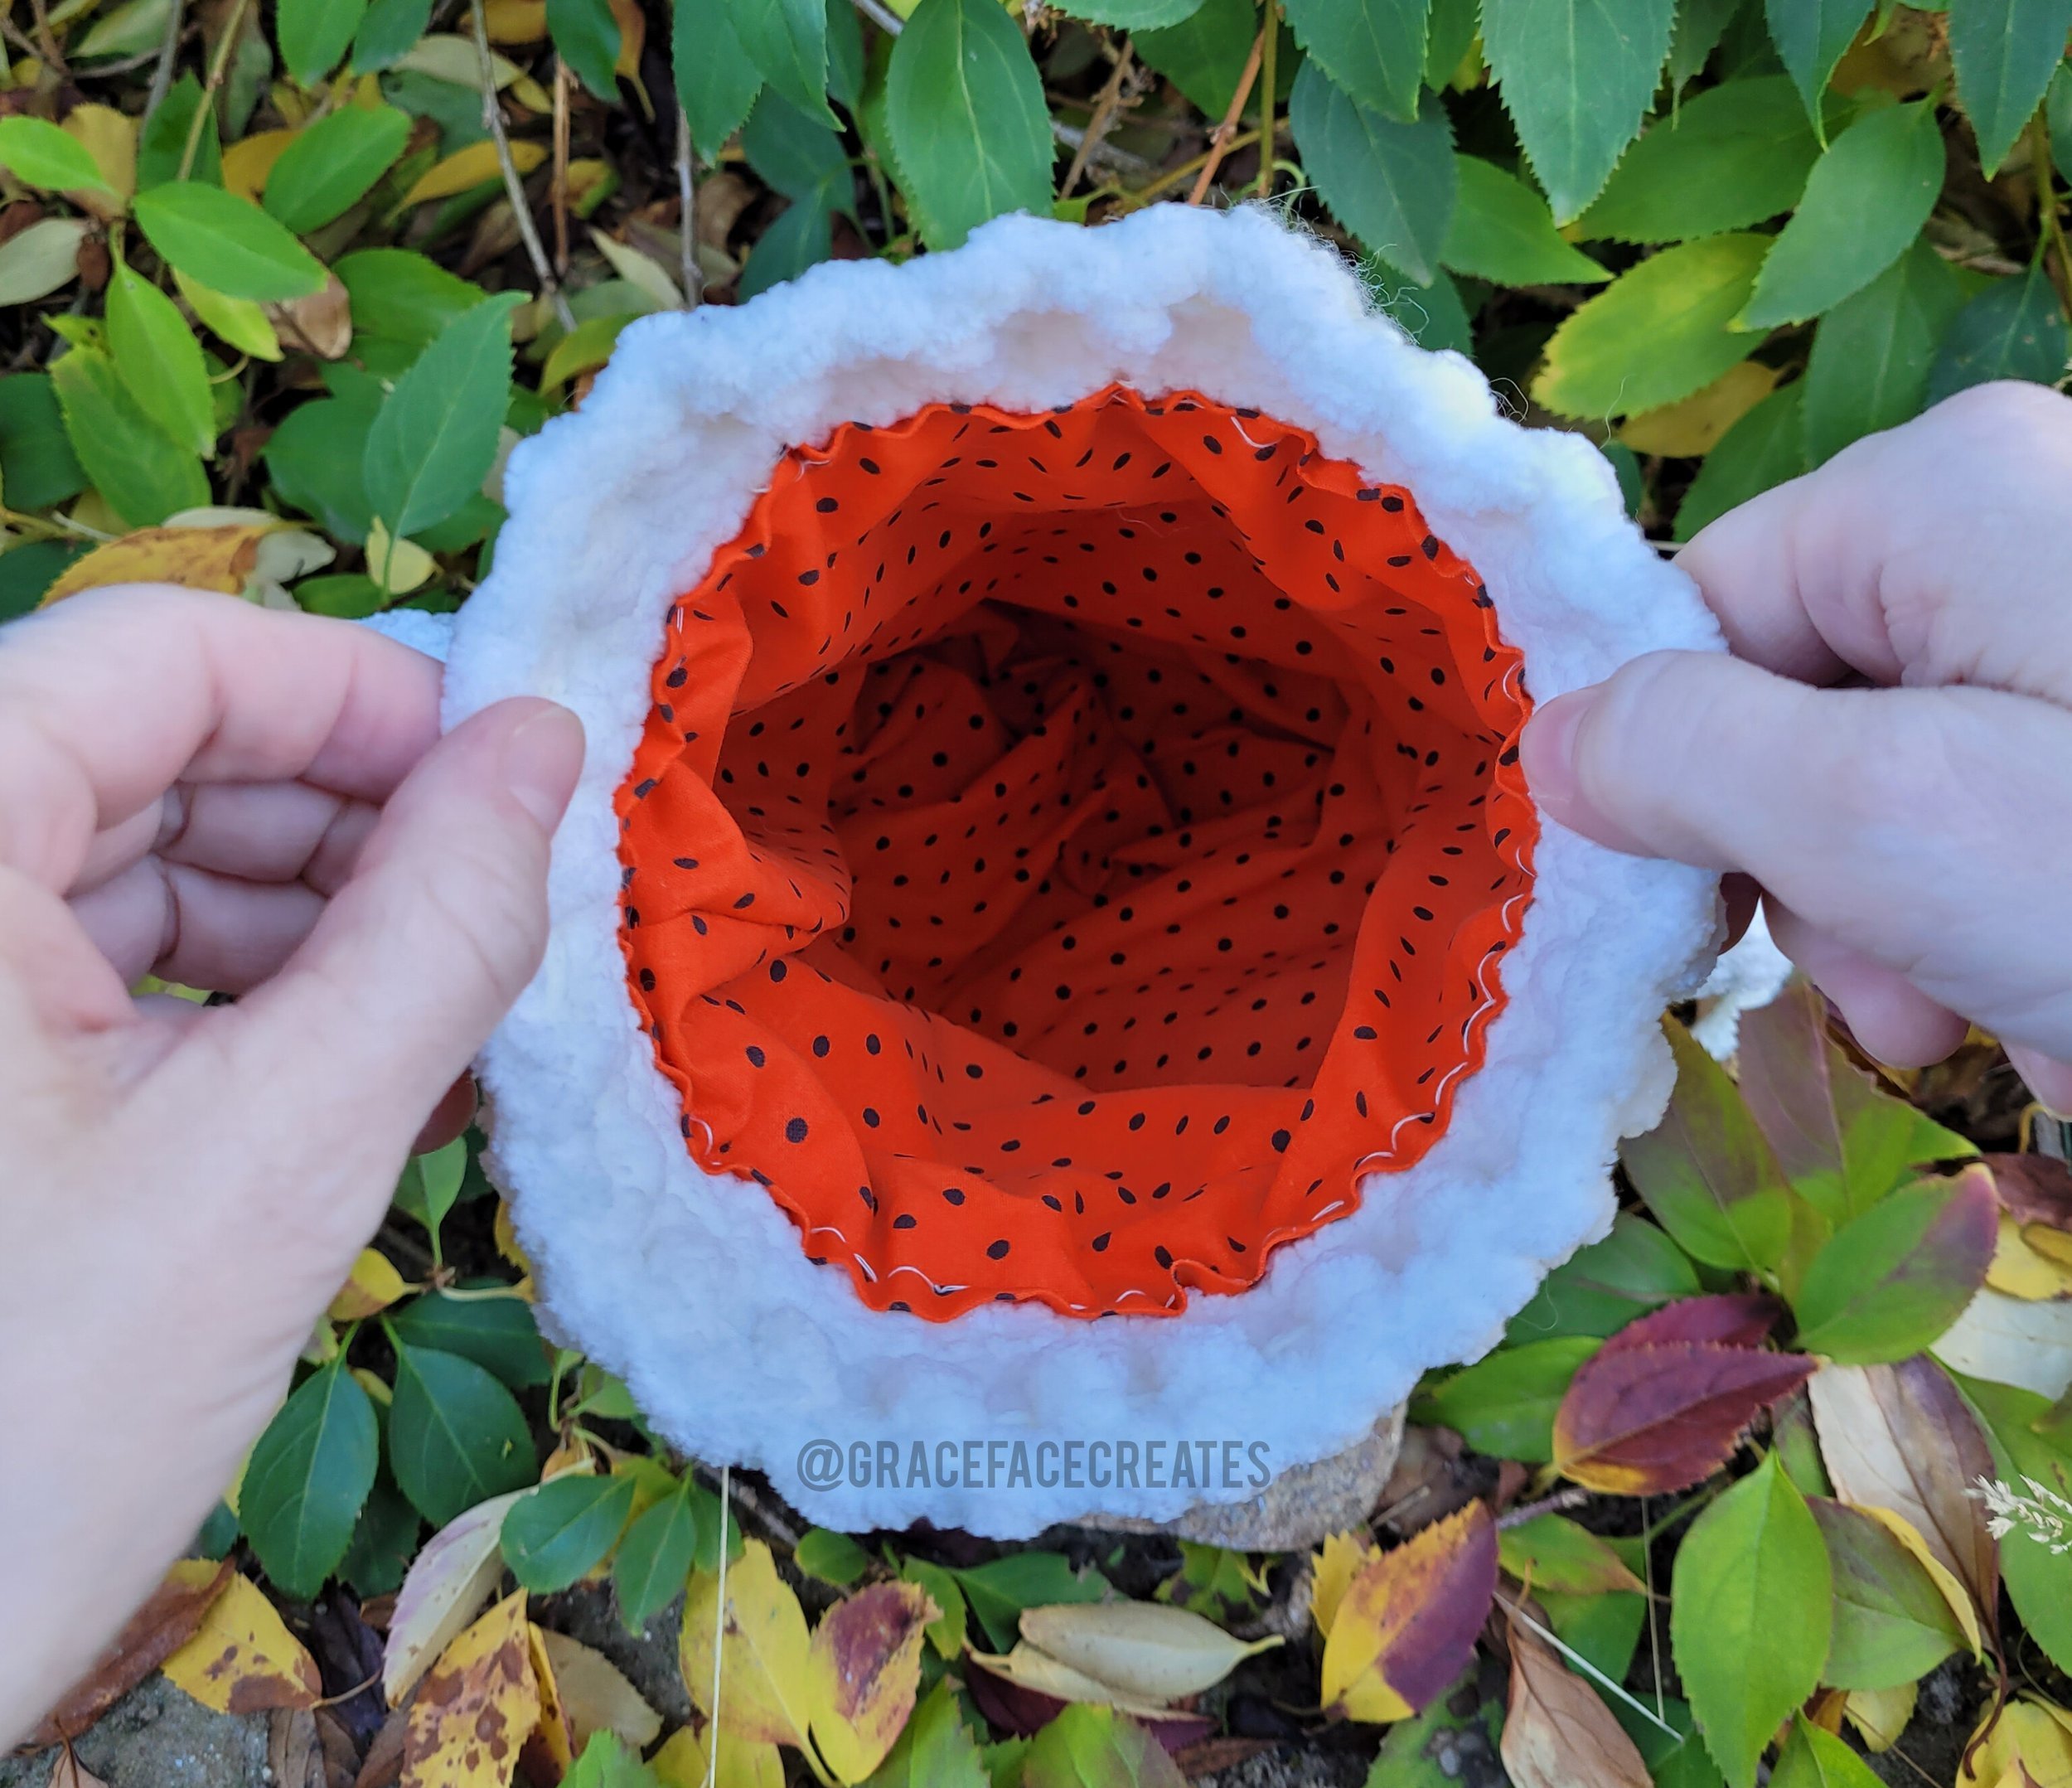
Looking down into the lined bag, you can see my very amateur sewing skills at work. Hey, she may be a bit of a mess, but she’s a functional mess :)
Lining your bag

Bonus: If you line your bag you won’t need to weave in the ends inside the bag
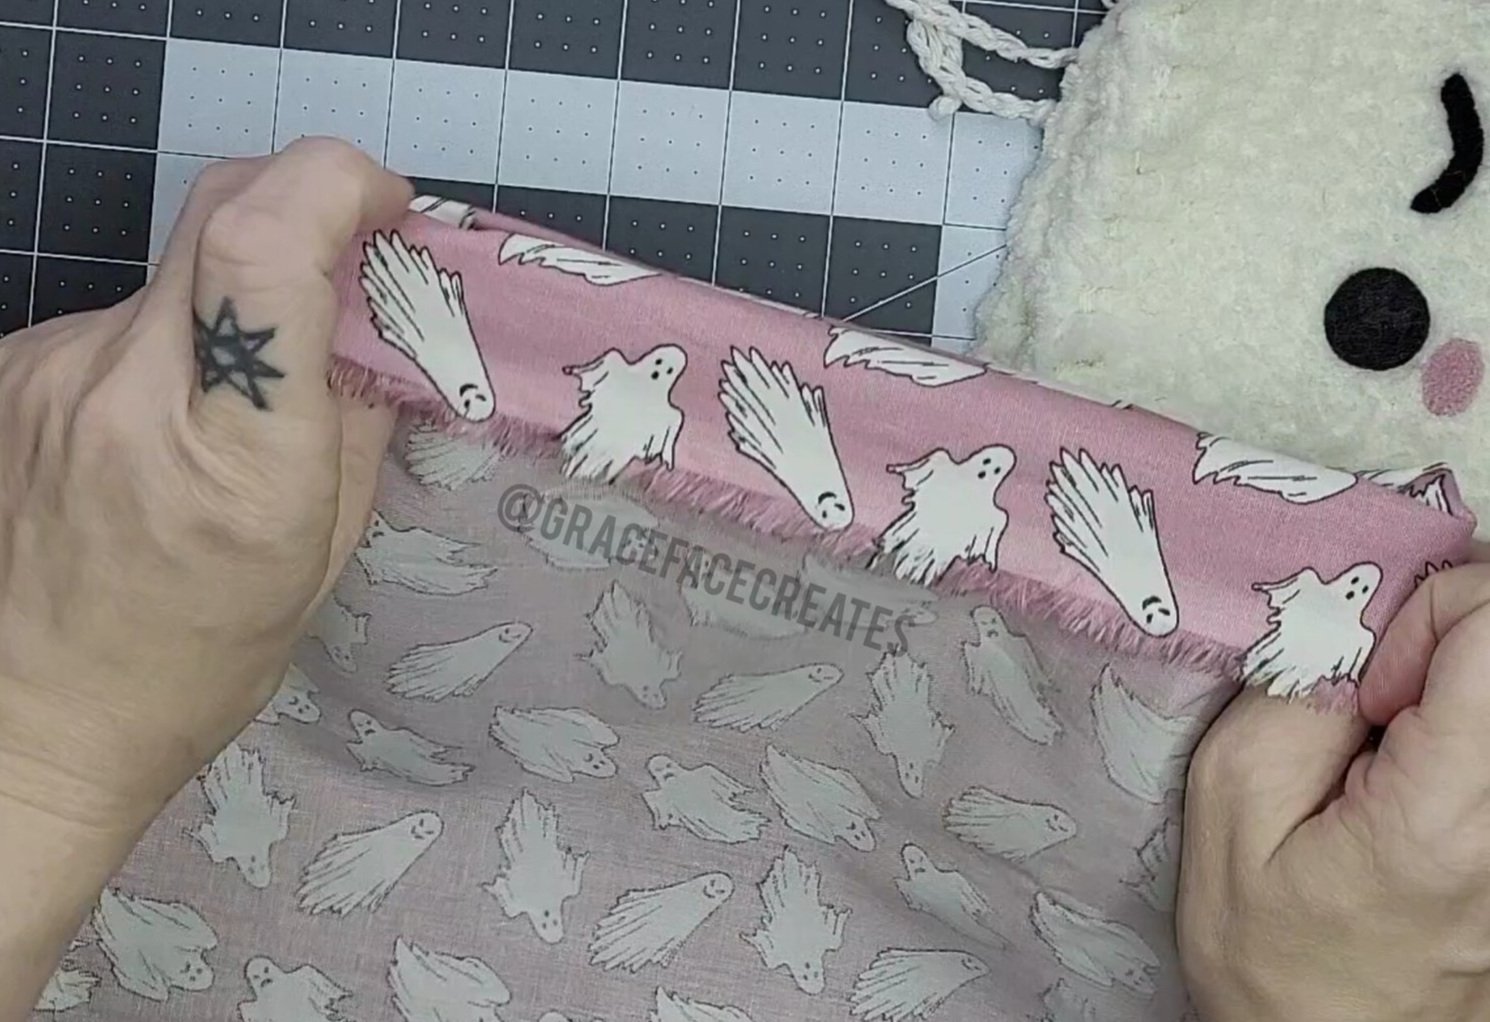
For a sturdier bag and more finished look, you can add a lining to your bag. I used a Halloween themed cotton prints to line my bags, but you can use any fabric you choose. If you do not want to line your bag, I recommend gluing a piece of felt/fabric over the back side of the face to cover the ends, so that the face doesn’t get damaged with use of the bag.

My high tech pattern for a liner. Your size may vary, so be sure to measure your bag and work from those measurements
I am not an expert at lining bags with fabric or sewing; this is only the 2nd or 3rd time I’ve ever done it & my hand sewing isn’t great, however the finished bag looks so good! I’m very pleased with the end result. I do recommend you get your sewing advice from someone more experienced than myself, but I am happy to share my process.

Cut a angle about 4 or 5 inches from the top to accommodate for the tapering of the bag (be sure to leave seam allowance)
The lining process took me about an hour to do, and I am very slow. I lined a 2nd bag and it only took me about 40 minutes. That included checking the liner for fitting before sewing it in place & making adjustments. I made a little sketch of the shape to help you if you decide to add a liner (see photo). The pattern is 13 inches long, 21 inches wide at the bottom, and tapers in the upper 4.5 inches to be 18 inches wide at the top. Mine still ended up a bit long, so do be sure to double check your liner before sewing it together. Pin it together and check the fit, then sew the liner together (I speak from personal experience here, as I did not do that the 1st time around).
Fold the edge of the fabric down to create a nice, finished hem at the top. Remember, the pattern should be facing the INSIDE of the bag (as shown above)
Fold the liner right sides together and sew the bottom and sides together. I used a back stitch for strength (I am a total sewing noob, so if there is a better stitch for this purpose, then please use it). Fold the top edge over the outside before sewing in place to create a finished edge (you can press this edge using an iron before placing the liner in the bag to aide the process). Sew the liner to the inside of the Ghost Backpack using white sewing thread, so that it will be invisible on the outside of the bag. I left a 1 round gap between the liner and the drawstring, to ensure the liner doesn’t interfere with the function of the bag.

Use sewing thread that matches the outer color of your backpack to ensure your stitches are invisible on the outside
Your Ghost Friend Backpack is COMPLETE! Now go forth and spoop it up :D
Be sure to tag me in your posts, if you post your makes online. I’d love to see your Ghost Friends!
Copyright 2023
Virginia Grace Kelley
All rights reserved